Not long ago I wrote about my hunt for an automotive unicorn. A car with the exact performance options needed to suit my very picky driving enthusiast tastes. Well, bringing the car home was only the first step, and it lead to my next odd automotive hobby: detailing. As you’ll soon see, I take this hobby way beyond simply washing and occasional waxing to keep a car shiny. This is the story of the full detailing of my 2016 BMW 435i.
Where it all began
To understand why I’ll spend upwards of twelve hours “cleaning up” a car, you need to know a little bit about my background. Like many people, I link many of the things I do today back to values instilled by my parents. In this case it’s taking care of your belongings, no matter their value or initial cost. I was taught to take great care of all my belongings and keep them in the best condition possible for as long as possible. I have vague memories of wiping down Hot Wheels cars and clearly remember washing (and some times waxing) my bike. In both cases, those items were always in far better condition than any of my peers regardless of their age.
Taking this even further was my Dad’s love of cars. We frequently attended car shows where we would marvel at the beautiful vehicles on display. The mechanics of the cars and beautiful paint and polished chrome work were admired equally.
The meeting point between these two influences from my upbringing is my love of auto detailing. It started with simply keeping my car, no matter how humble, clean and in good condition. Then over time I slowly learned the importance of using better products and the improved results I’d achieve. This lead to waxing and applying higher grade sealants. Then one day I purchased a dual action polisher to fix up my oldest daughter’s car before she headed off to college. The amazing results set the hook and I discovered a totally new hobby.
Now, on to the whole reason you started reading this post in the first place.
Initial inspection
Anyone infected with the detailing disease knows any new car in the driveway will require some quality time before it meets their standards. The biggest question becomes exactly how much time. My car was mechanically perfect with low mileage, but the minute the sun came out from the clouds on my second test drive, the true condition of the paint became very clear…or in this case, rather hazy and swirled up.
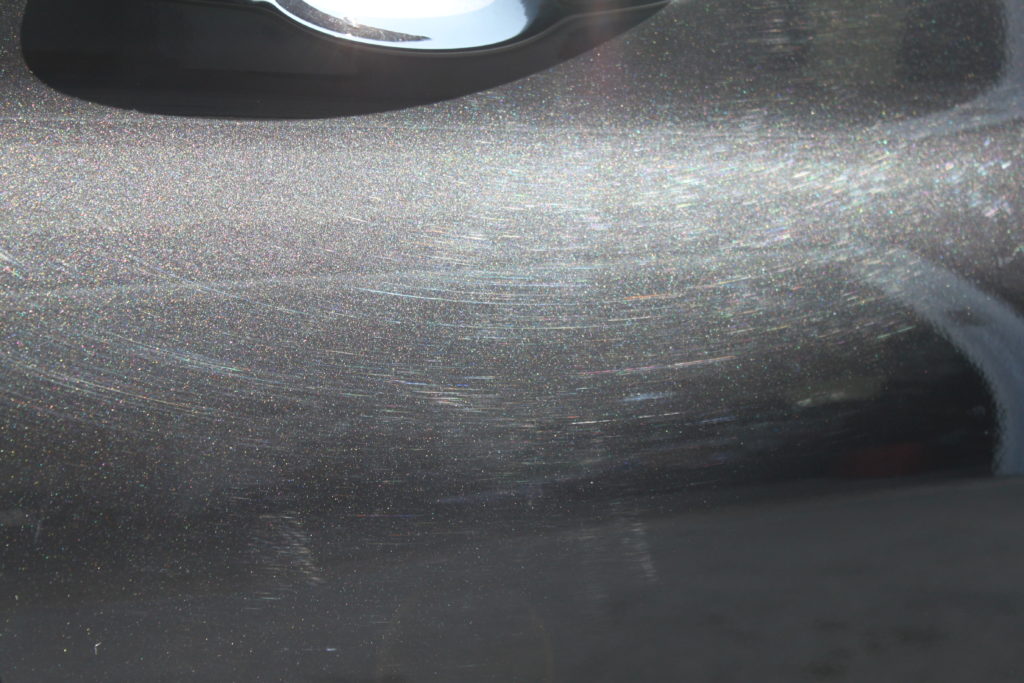
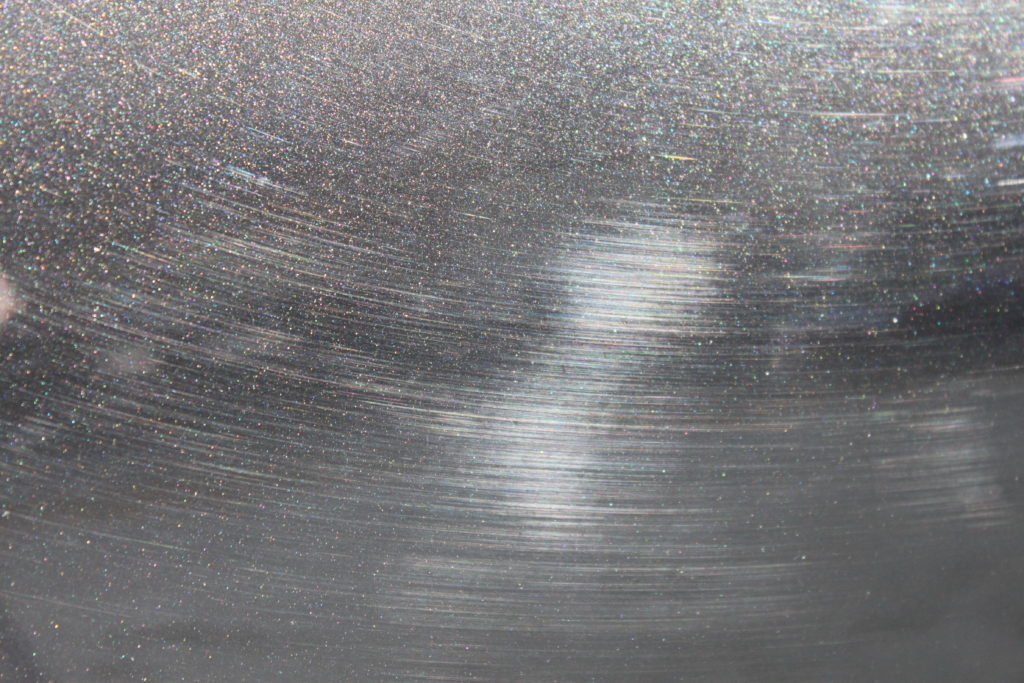
The swirls all over the passenger door (seen above) caught my eye first. Even from a distance it was quite noticeable. From there I started to walk around
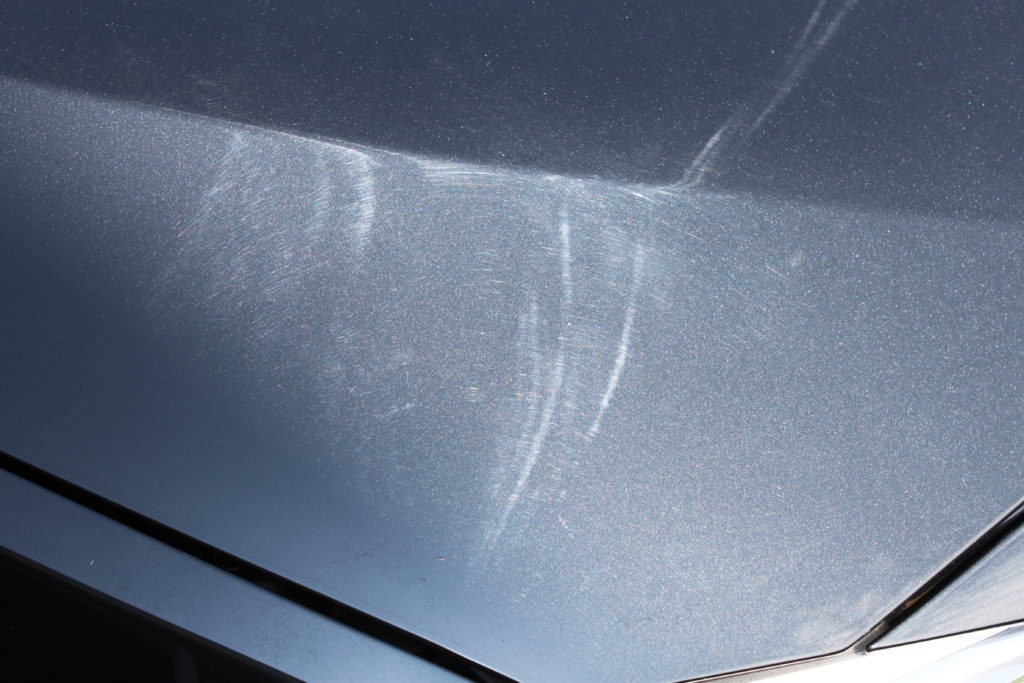
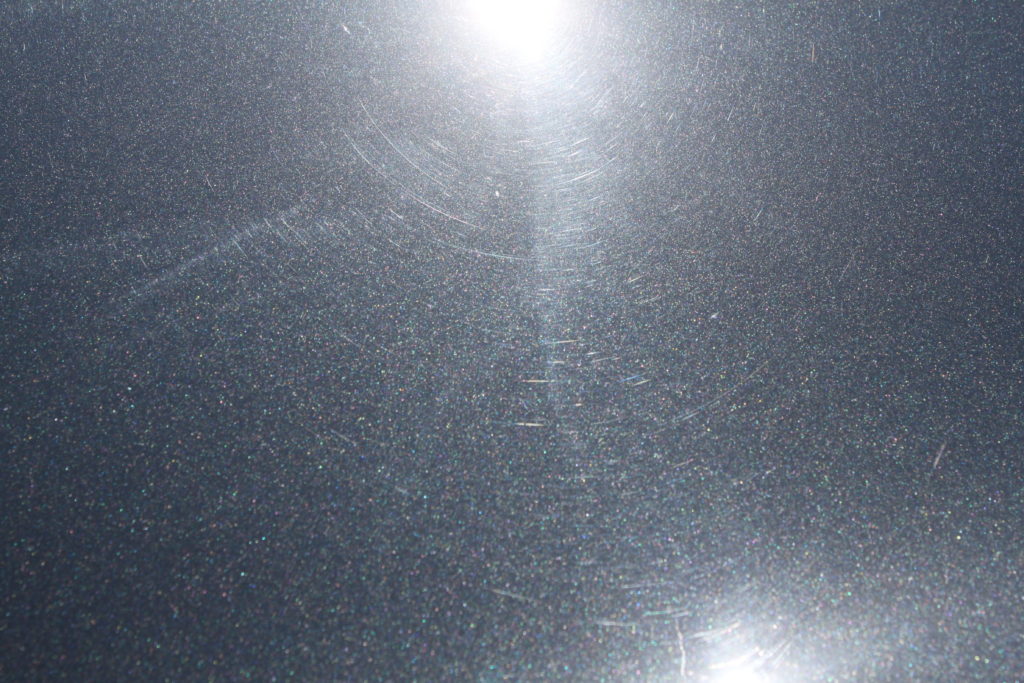
As you can see, no surface panel was free from swirls. They were everywhere and really muted the beauty of the black metallic paint.
The wheels and the brake calipers were equally neglected. The faces of the wheels were clean but the barrels were loaded with brake dust as well. Take a look.
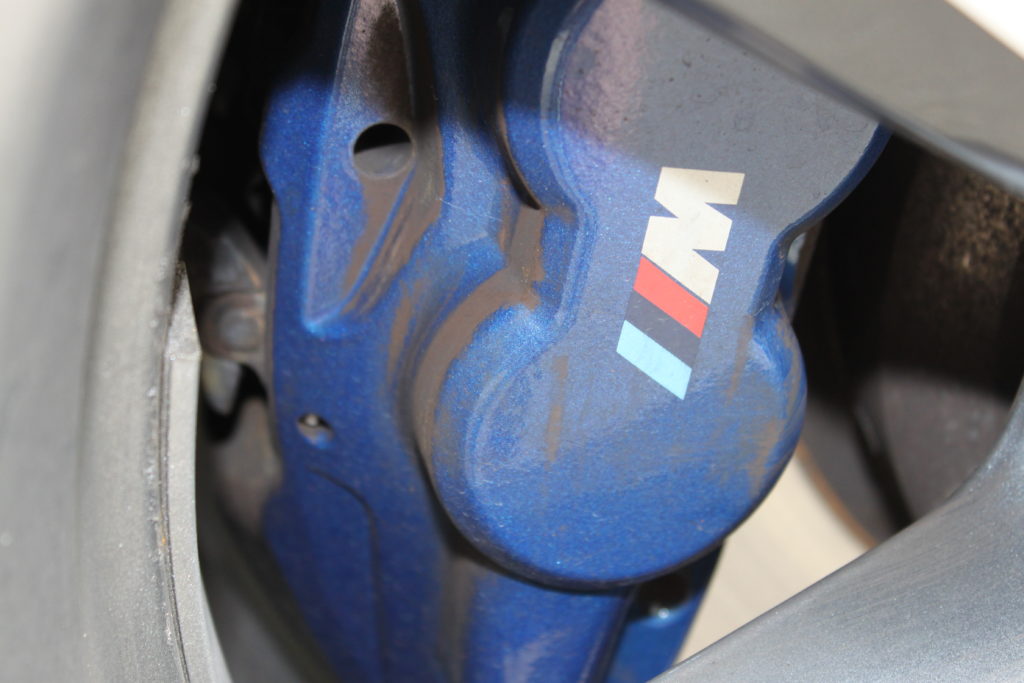
All of this points to a previous owner focused on the mechanical well being of the car, but really uninformed or simply not too concerned with appearance. The damage to the paint was most likely caused by the brushes at an automatic car wash or the dirty washing and drying rags frequently used by the local, high volume, hand car washes and dealerships.
It all starts with a wash
The first of what will be many washes for the car while I’m the owner started with a rinse with a power washer and then a thorough washing using Optimum’s Car Wash. Optimum’s Car Wash has been my first choice for several years now. It cuts through grime, yet won’t degrade any protective product applied. It also has a high level of lubricity which allows a soft wash mitt to glide across the surface reducing the chance of swirls being created from washing.
The wheels and brake calipers saw a heavy application of Poorboy’s World’s Acid Free Wheel Cleaner. This wheel cleaner is fairly new, but I like because it clings to the surface and then foams up when agitated with a wheel brush. All of this lead to longer dwell time on the surface and better cleaning results. It is just strong enough to cut right through brake dust and road grime without causing any damage to the wheel.
After the wash, things started looking better. Here is the same brake caliper. The blue color really stands out and the calipers are easily seen through the wheel. A little baked on brake dust remains to be removed at a later date when the wheels come off and I have better access
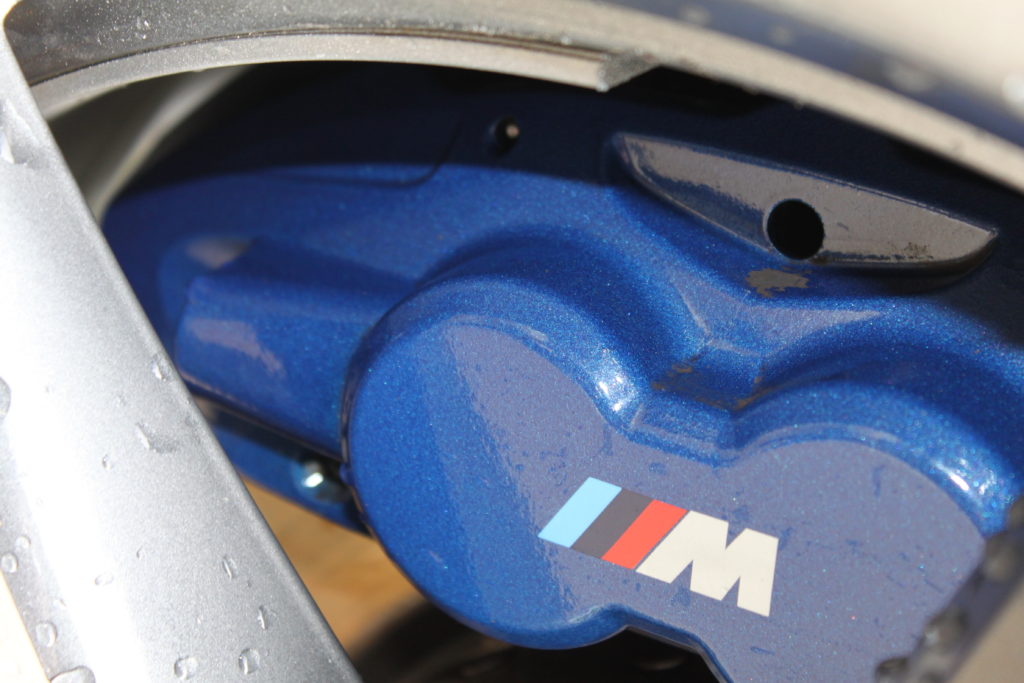
After washing, I ran detailing clay over the entire car. The clay showed very little embedded grime so I didn’t bother taking any pictures. This tells me despite the horrible washing technique, the previous owner did actually keep it pretty clean to prevent build up of any heavy grime on the paint.
The rest of the car is looking much better following the deep cleaning Here is the rear of the car before and after removal of the model badges.
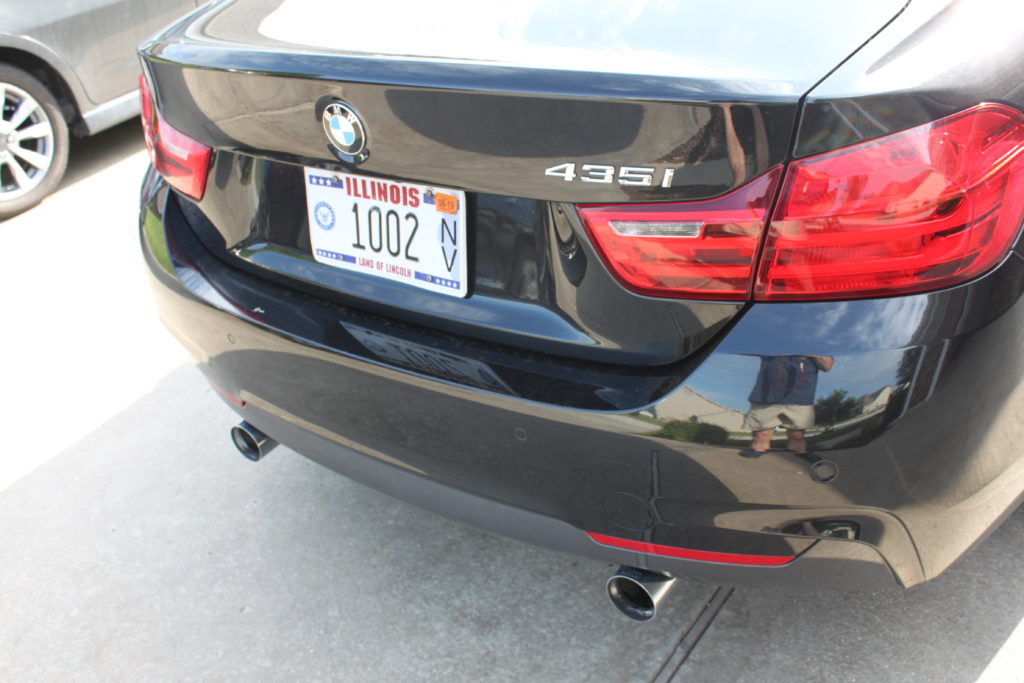
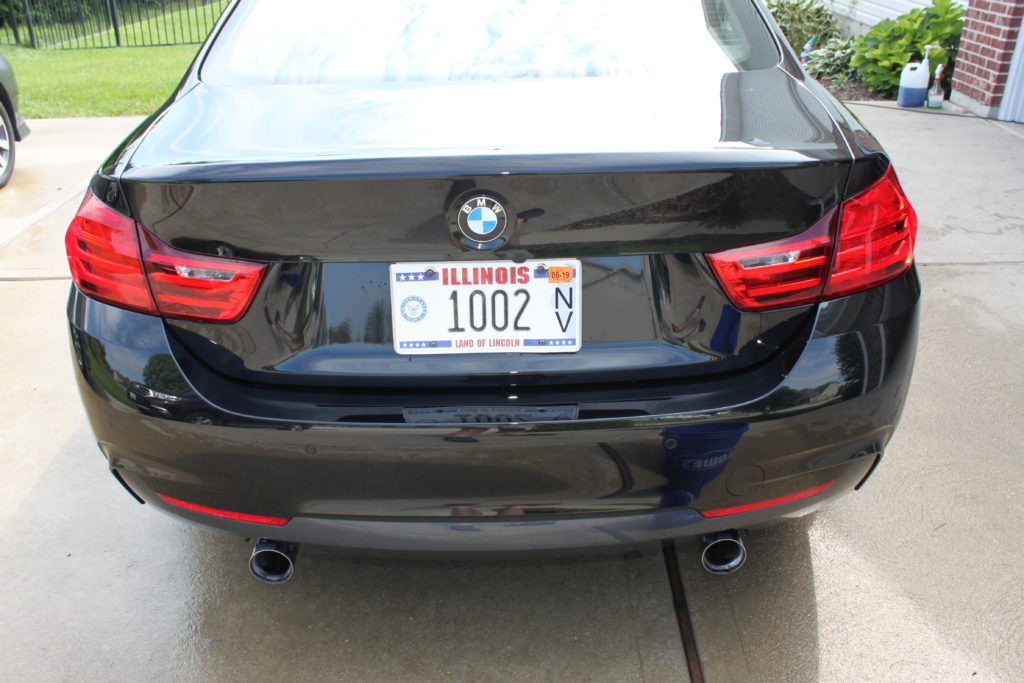
Removing the badging not only makes the car easier to clean, but it also creates a nice unbroken look to the back of the car without any distracting chrome numbers which I feel look out of place and serve no purpose.
Yes…the tail pipes are still looking a little dirty, but more on those later.
Into the garage for the real work
The car is now clean, decontaminated with a claybar, and free from unneeded badges. Time to pull it into the garage and get to the real work of restoring a shine to the paint.
With my work lights in place and a small, rolling work stool stocked with my polishes and pads, I set to work. Illuminating the paint with the work lights didn’t help me feel any better about it’s condition. Here are a couple pictures from just the passenger door.
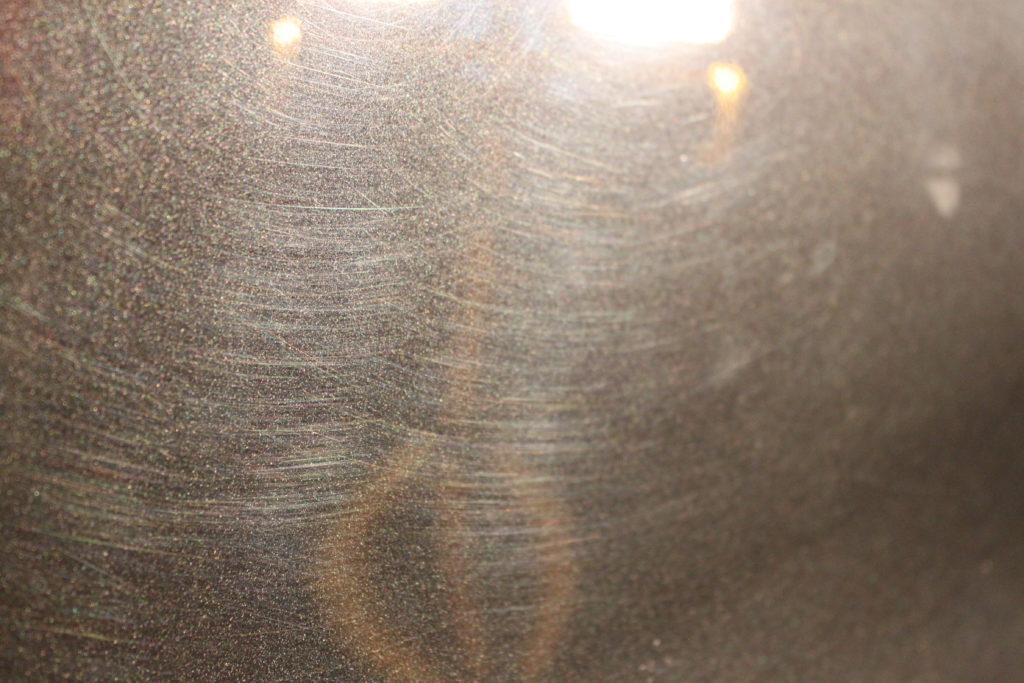
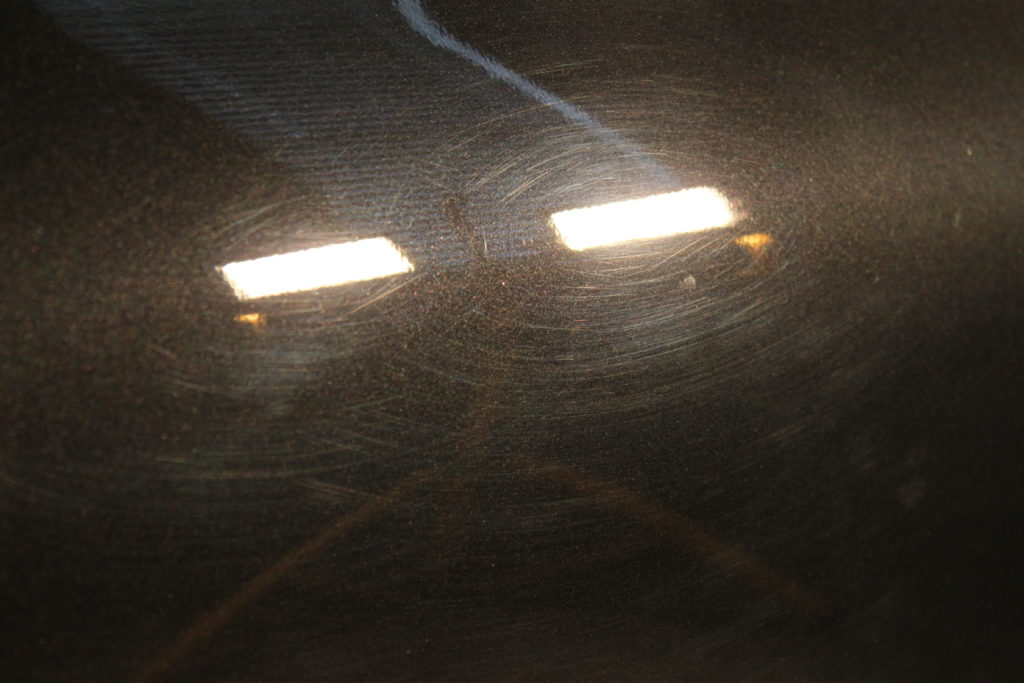
The swirls shown here along with the defects seen in the outdoor pictures at the beginning of this post are perfect examples of how improper maintenance by the previous owner was robbing the car of the true beauty of the black metallic paint.
I set about doing a test spot on the worst portion of the passenger door using my humble Harbor Freight dual action polisher, Blackfire’s SRC Compound (no longer sold) and a white Lake Country Flat Polishing Pad. This compound and pad combination served me well when working on the hard, black, metallic paint found on my VW GTI. Knowing BMW paint was similar, I was hoping this combination would work well. I also knew the damage to this car was far worse than GTI and a more aggressive approach may be needed. After running a tape line down the door to facilitate before/after photos, I polished out a portion of the door and was pleasantly surprised by the results. I apologize in advance for the clarity of some photos. Photographing defects on paint with a high metallic content is really hard to capture.
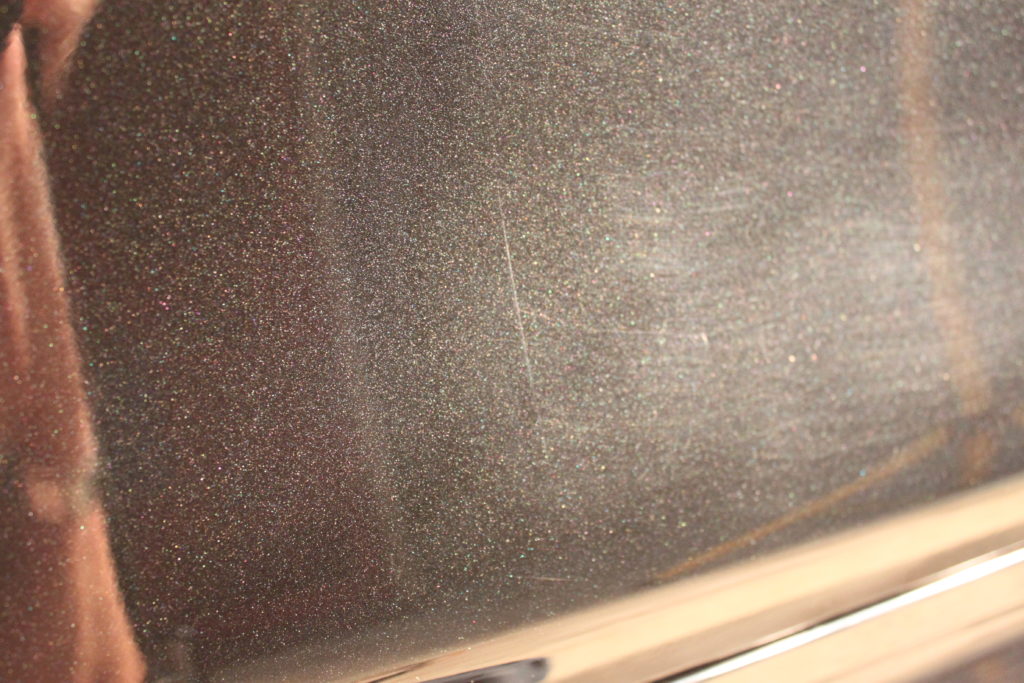
The polished area on the left of the tape line is free of swirls. Here is a closer picture of the area highlighting the removal of all the swirls.
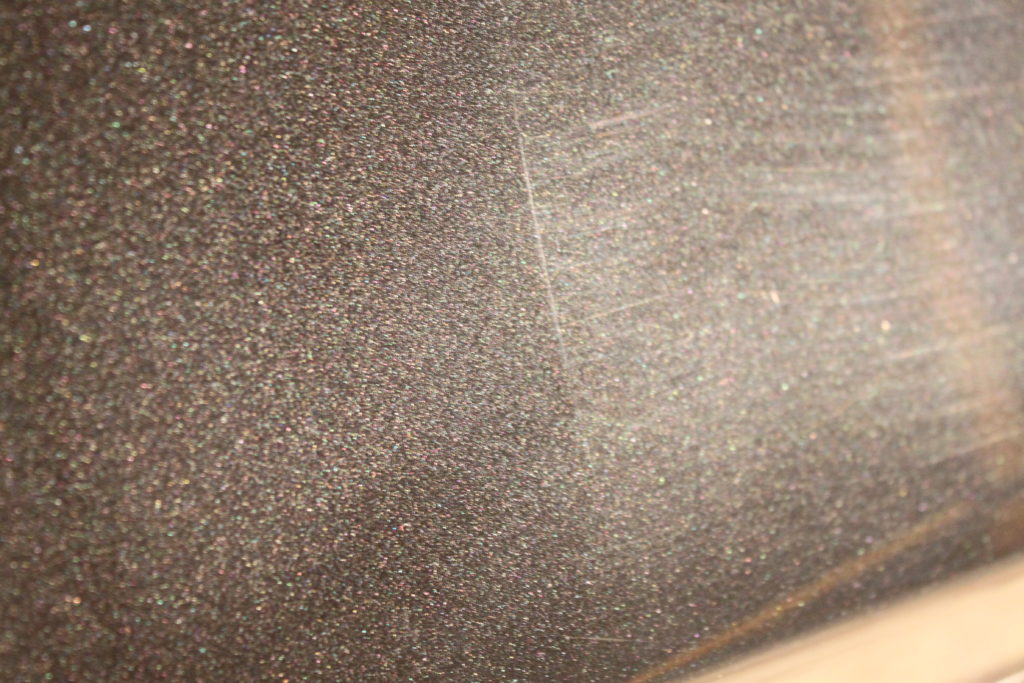
My initial selection of pads and polish turned out to be the right choice. Take a look at the right side of the picture in both images above and the one below. Notice how the uncorrected areas appear clouds and more gray looking? When polishing out darker colored cars, they will often appear to be a different color or much darker when the work is complete. In the worst cases metallic flakes will appear which weren’t visible in the past.
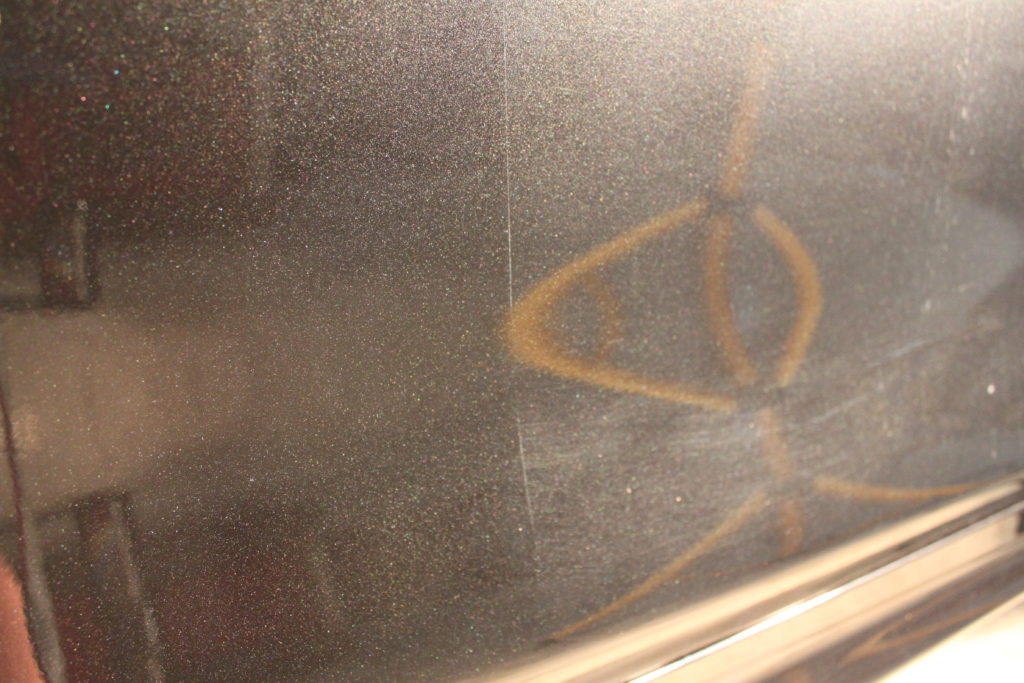
With the proper product combination locked in I set about polishing out the car. Finishing the entire car took nearly six hours. Before moving on to the next step I sat back and took another picture of the door where I started. Paint which previously appeared rather hazy and dull now looked like this.
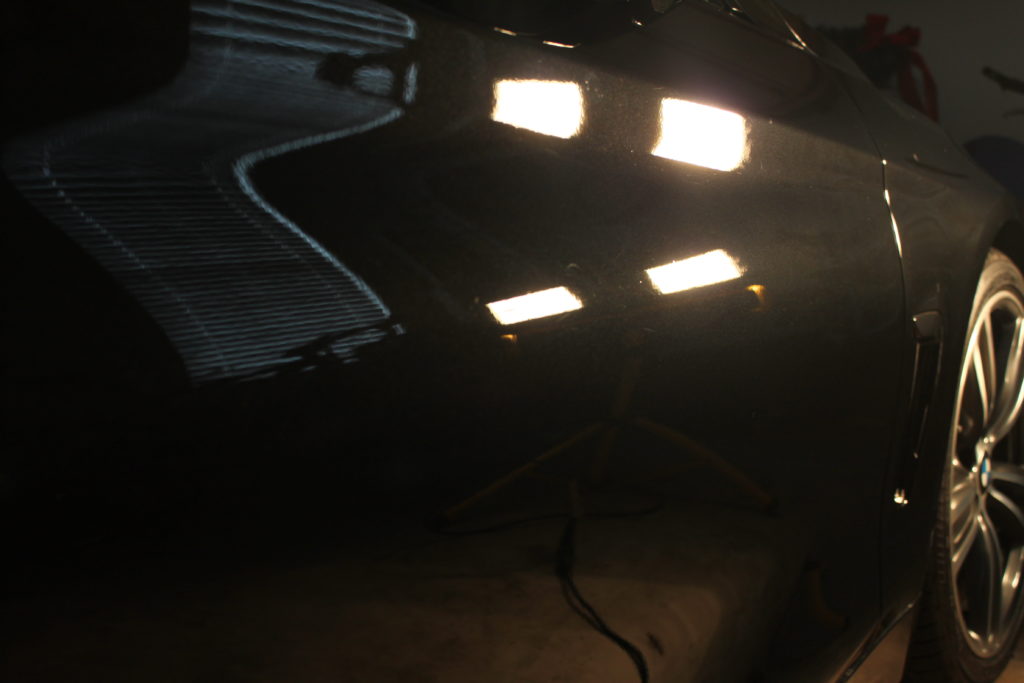
At this point I wiped down the entire vehicle with Gyeon’s Prep, a coating preparation spray, to remove any oils the polish may have left behind and make sure the surface was perfectly clean for the application of a ceramic coating.
CarPro’s CQuartz UK 3.0 paint coating was chosen to protect the paint. I use coatings primarily because they last three to four times longer than most waxes or sealants, but also because they considerably reduce the amount of effort needed to keep a car clean and looking good. I’ve now used CQuartz UK on multiple vehicles and never been disappointed. It’s a great product that lives up to the manufacture’s claims.
While the coating dried, I turned my attention to the aluminum tailpipes. The picture below shows the outer edges of the tailpipe in pretty good shape after a cleaning with some automotive all purpose cleaner. However, they were not real shiny and the inner lips had built up exhaust soot.
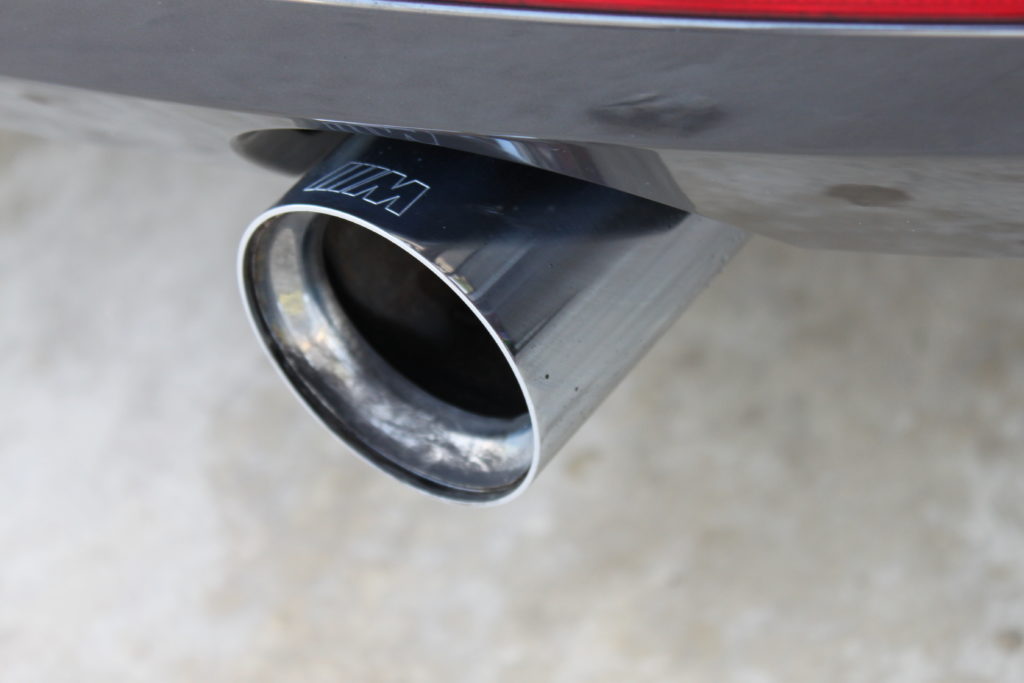
Recently when cleaning up neglected tail pipes I resorted to a combination of 0000 steel wool and Mothers Mag and Aluminum Polish. Exhaust soot is often caked on and feels as if it’s bonded to the surface. However, when pulling out the polish and the steel wool of my cabinet in the garage, an old can of Eagle One’s Nevr-Dull caught my eye. Nevr-Dull has been highly recommended in the past, but never seemed aggressive enough to work very well on past vehicles. It had since been down graded to polishing oxidized metal items around the house. Just for grins, I grabbed the can and thought I’d give it a shot with this car. To my surprise it worked really well on this car and made quick work of the soot while giving a nice shine to both tailpipes.
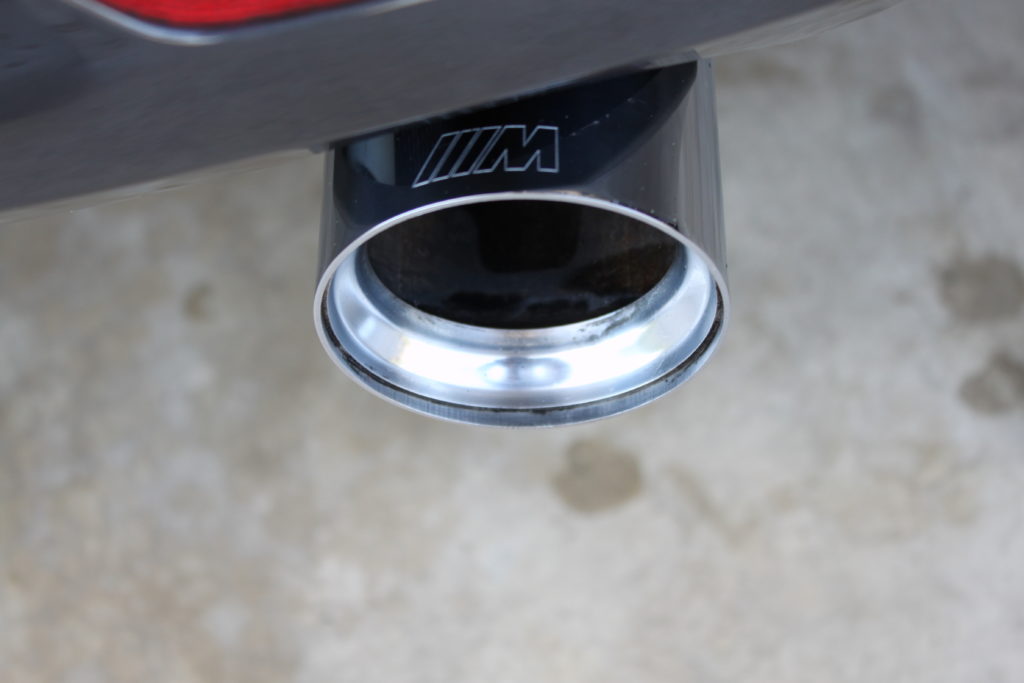
The big reveal
After hours of in the garage, it was time to pull the car out into the sun and see if all the hard work paid off. Once in the sunlight I was really pleased. None of these photos are enhanced or edited in any way.
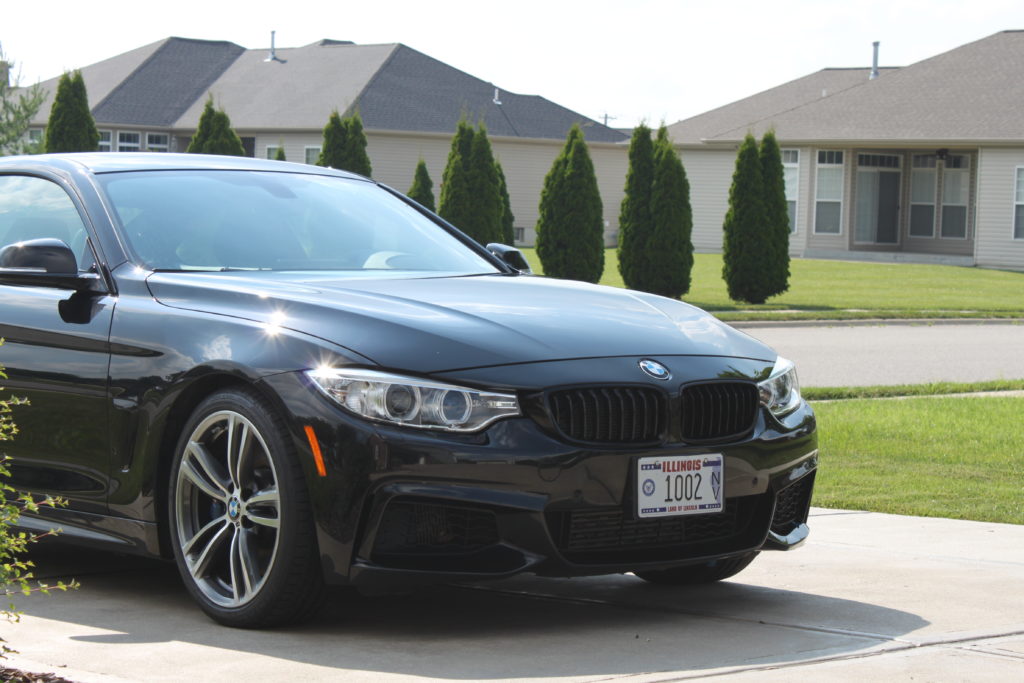
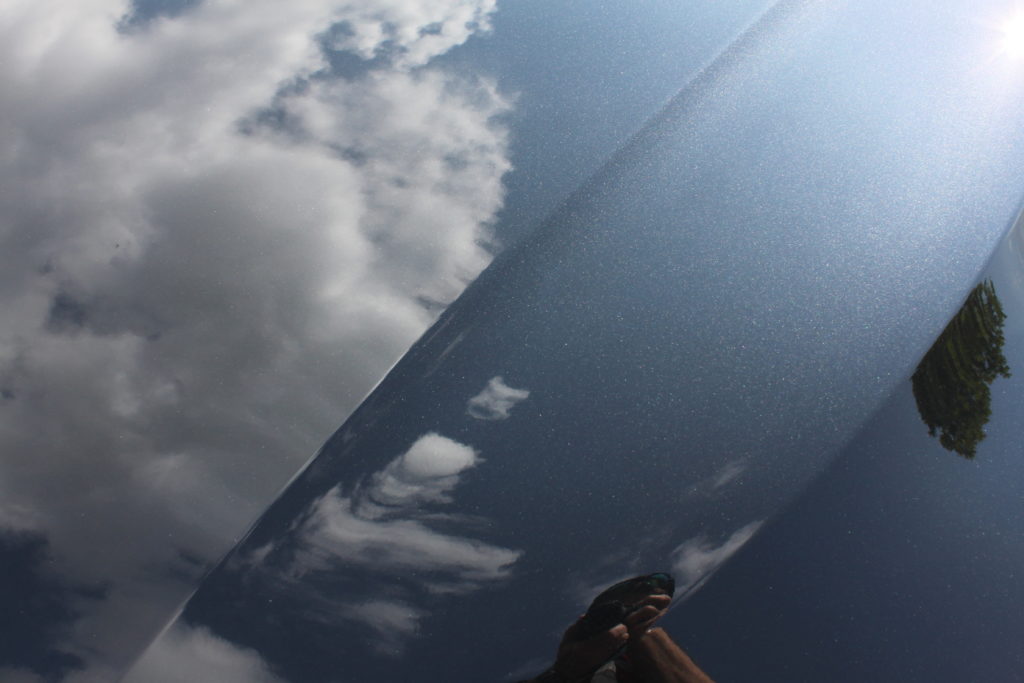
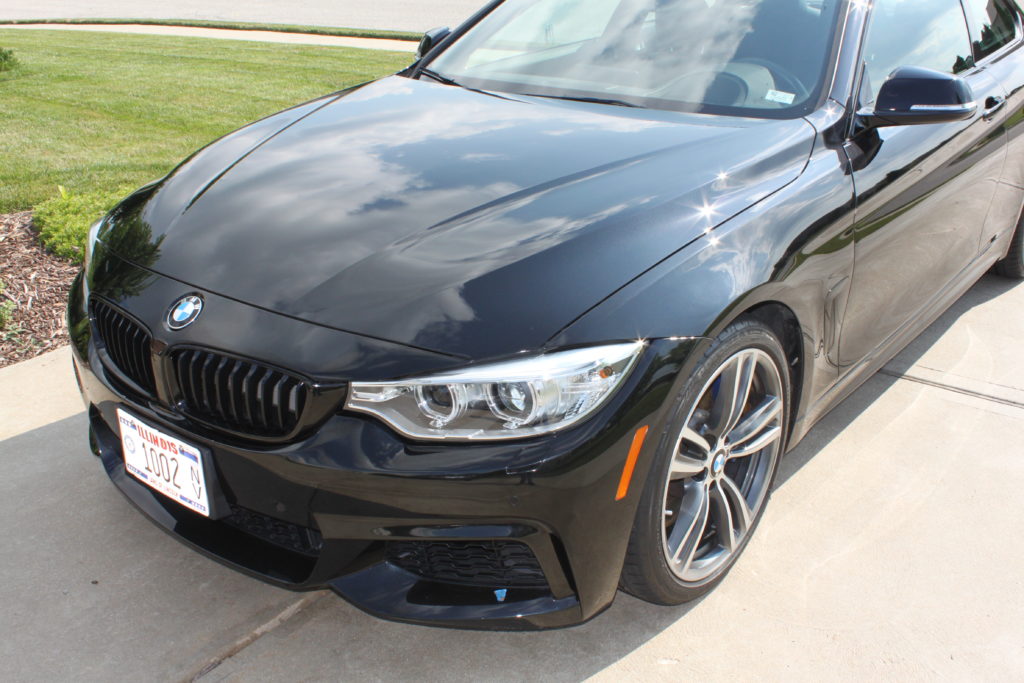
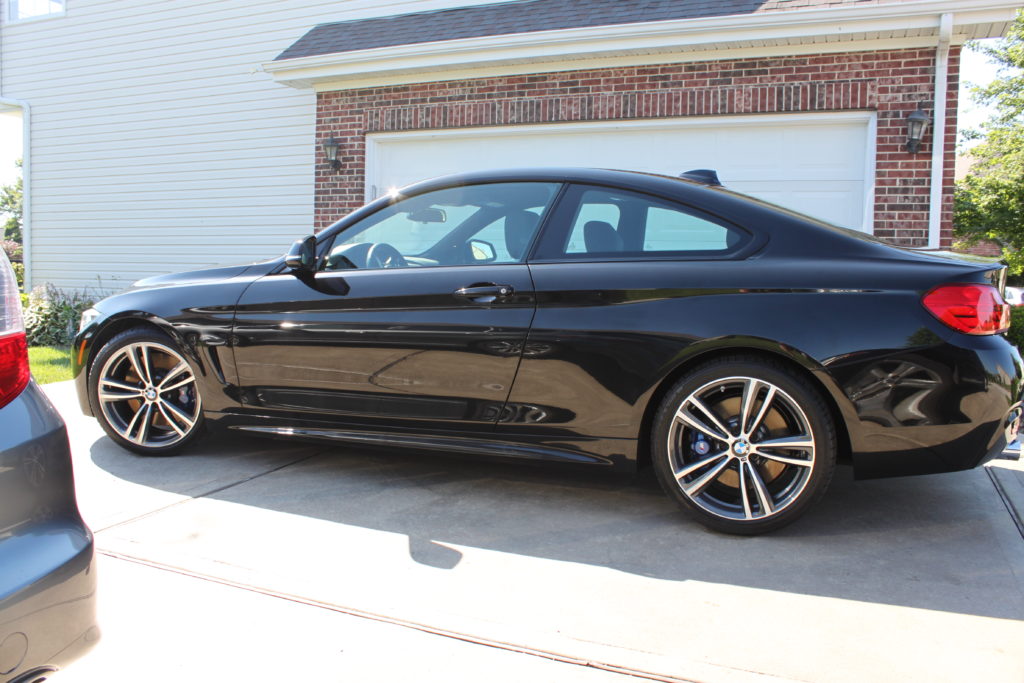
Hopefully you enjoyed reading about this project. Time was short so I didn’t take as many pictures as I probably should have of the entire process, but hopefully there are enough to highlight the work and the results. Future projects and product reviews will have more images and details on each step.

It is really a nice and helpful piece of info. I am happy that you just shared this helpful information with us.
Please stay us up to date like this. Thank you for sharing.